
Long before the Industrial Revolution flooded cabinet shops with cheap machine-cut screws and wire nails, joiners relied on an ancient mechanical marvel to lock tables, chairs, and chests together: the hand-whittled wooden peg. Known in historic trades as a “treenail” (trunnel) or “drawbore pin,” this simple wooden dowel was far more than an archaic fastener—it was an active structural clamp engineered to hold furniture rigid for centuries.
For antique collectors, appraisers, and conservators, wooden pegs provide one of the most infallible, tamper-evident dating benchmarks in decorative arts forensics. Because wood behaves according to rigid biological laws of shrinkage across centuries, an authentic early American or European joint cannot hide its true age. Yet, because modern reproduction factories frequently glue shallow fake dowel plugs into contemporary tables to simulate age, mastering the microscopic differences between authentic hand-carved drawbore pins and modern factory dowels is an essential authentication skill.
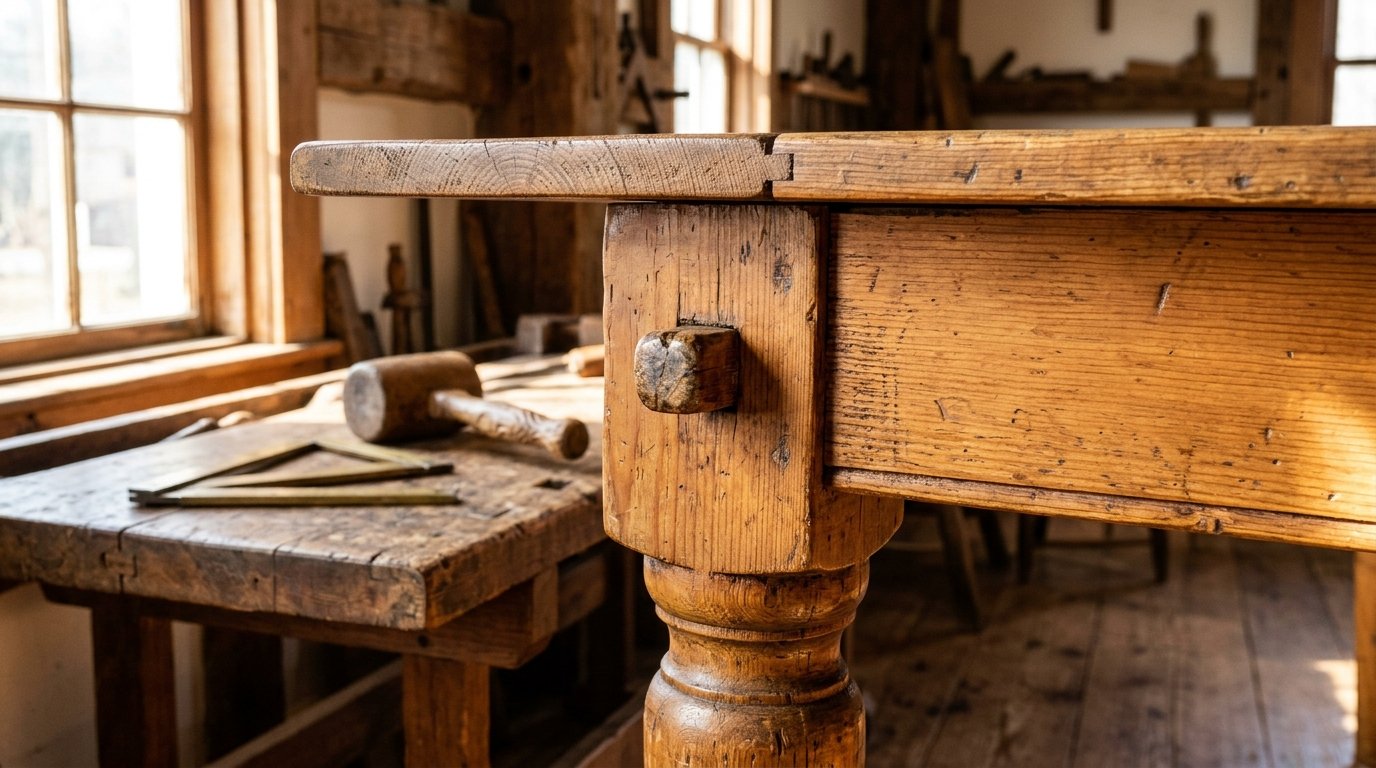
Quick Reference: 5 Diagnostic Benchmarks of Authentic Antique Pegs
When inspecting an antique table, cabinet, or bench represented as 17th-, 18th-, or early 19th-century, check these five physical benchmarks before making an acquisition:
| Diagnostic Benchmark | Authentic Pre-1840 Hand-Whittled Peg (Treenail) | 20th-Century Factory Dowel / Modern Fake |
|---|---|---|
| Surface Elevation (“Proudness”) | Stands “proud” (raised 1/32″ to 1/16″) above surrounding wood due to centuries of tangential cross-grain shrinkage. | Completely flush or countersunk; sanded mathematically flat with modern orbital or belt sanders. |
| Hole Geometry & Shape | Surrounding hole has shrunk into an oval/ellipse (narrower across the grain); peg is compressed. | Perfect mathematical circle; zero directional shrinkage or distortion under caliper measurement. |
| Cross-Sectional Facets | Hand-whittled with a knife into a tapered polygon (6-sided or 8-sided); subtle knife facets under 10x loupe. | Extruded, perfectly smooth cylindrical dowel rod; often exhibits modern spiral factory glue flutes. |
| Structural Penetration | Through-joint penetration: Peg passes completely through mortise and tenon, visible on unsealed interior frame. | Shallow blind cap: 1/4″ slice glued into a shallow surface hole; no penetration on interior frame. |
| Timber Species Contrast | Often crafted from dense, rot-resistant hardwood (white oak, hickory, ash) contrasting with softer pine/tulipwood aprons. | Homogeneous modern birch or beech dowel matching mass-production lumber stock. |
1. The Mechanical Genius of the Drawbore Joint
To evaluate wooden pegs accurately, one must first understand that 18th-century joiners did not merely drill a hole through an assembled table frame and tap in a stick. They employed a sophisticated clamping technique called drawboring (or “draw-pinning”).
How the Drawbore Mechanism Works:
- The joiner cut the mortise socket into the table leg and bored a clean hole through both side cheeks of the mortise using a spoon bit or T-auger.
- The tenon on the end of the apron was inserted into the mortise, and the joiner used the auger point to mark the center of the hole onto the tenon tongue.
- The tenon was withdrawn, and the joiner deliberately bored a hole through the tenon offset approximately 1/16th to 1/8th inch closer to the tenon shoulder.
- When the joint was reassembled, the two holes did not line up—the hole in the tenon was pulled inward toward the leg.
- The joiner then drove a hard, tapered, polygonal wooden pin through the misaligned holes. The wedge action of the pin forced the tenon hole into alignment, dragging the tenon shoulder violently tight against the mortise face with hundreds of pounds of mechanical pressure.
This explains why authentic antique tavern tables, harvest tables, and through-tenon antique trestle tables built in the 18th century remain rock-solid today without a single drop of hide glue surviving in the joint. The drawbore pin and keyed tusk tenon act as permanent, spring-loaded mechanical locks.
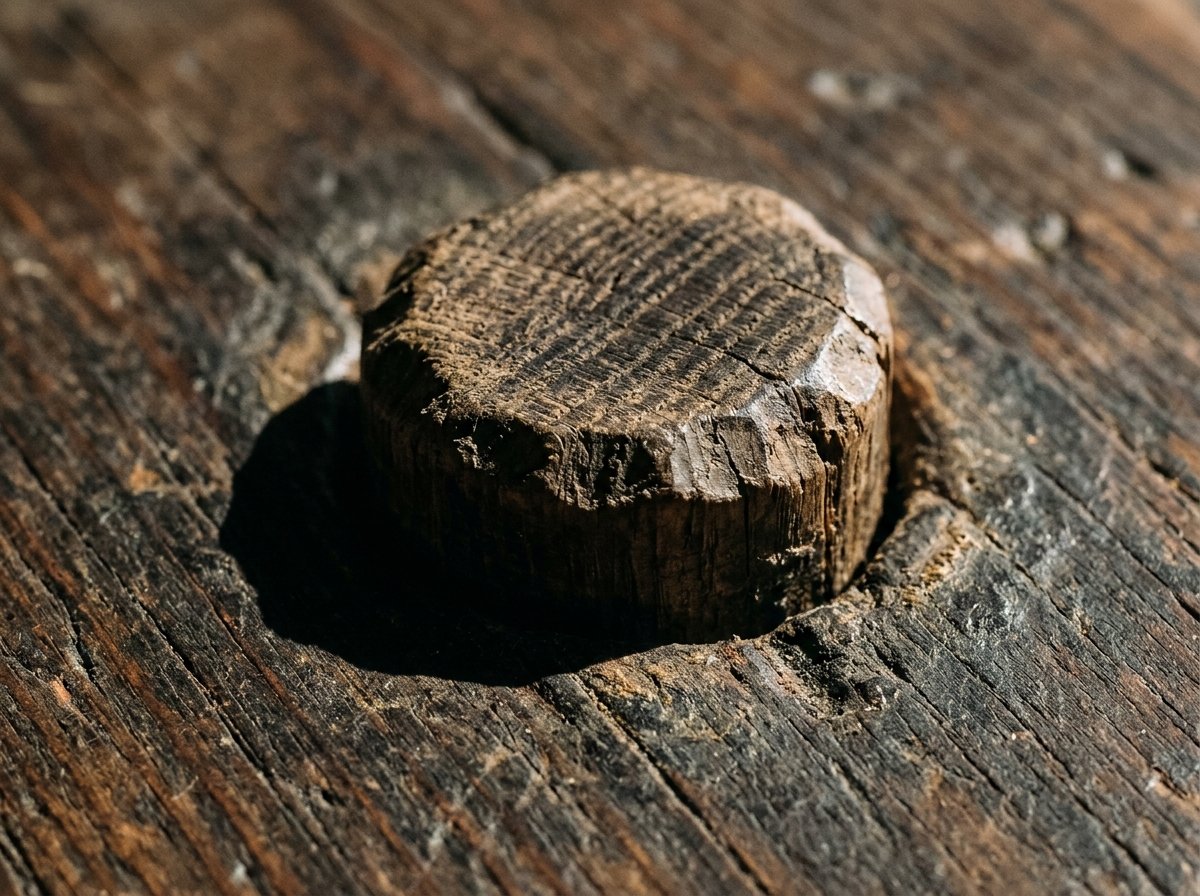
2. The “Proud” Peg Phenomenon: Transverse Shrinkage Forensics
The single most powerful physical test in peg forensics is the “Proud Peg” tactile check. It is governed by a fundamental biological principle of timber science:
Wood shrinks tangentially (across the growth rings) and radially (across the grain width) as ambient relative humidity fluctuates across seasons. However, wood experiences virtually zero dimensional shrinkage along its longitudinal cell length (parallel to tree growth).
Why Genuine Pegs Protrude Across Centuries:
When an 18th-century joiner drove a peg through a table apron, he cut and planed the peg’s end-grain perfectly flush with the face of the leg or apron. Over the next 200 to 300 years, the following transformation occurred:
- The leg and apron boards shrank in width and thickness by 5% to 8% across their grain.
- The peg, driven horizontally, has its longitudinal wood fibers running along its length. Its length did not shrink at all.
- Consequently, the surrounding face of the leg shrank “down and away,” leaving the end of the peg standing 1/32 to 1/16 of an inch elevated (standing “proud”) above the surrounding wood surface!
- Close your eyes and run your fingertips firmly across the joint. On a genuine, unstripped 18th-century table, you will feel the distinct raised ridge of the peg. If the peg is flush or sunken into a crater, it was either aggressively machine-sanded during a modern refinishing job or installed recently.
Hole Ovalization:
Because the surrounding apron board shrank strictly across its grain width (vertically) and not along its length (horizontally), the original round auger hole was compressed into an ellipse or oval. Under a 10x jeweler’s loupe, authentic antique peg holes are visibly narrower across the grain than along the grain. A peg hole that remains mathematically round in all radial directions is a hallmark of post-1900 machine construction.
3. Hand-Whittled Polygonal Facets vs. Modern Dowel Rods
Before the mid-19th century, factory-extruded wooden dowel rods did not exist. Joiners could not buy uniform 3/8-inch birch rods from a hardware supplier. Instead, every single peg was manufactured by hand on site:
- Riving from Dense Heartwood: The joiner used a froe and club to split straight-grained blanks from dense, seasoned white oak, hickory, or ash. Riving (splitting along natural wood fibers) ensured the peg would never shear under load.
- Whittling the Facets: The joiner sat at a shaving horse and shaved the split blank with a drawknife or carving knife into an irregular 6-sided, 8-sided, or octagonal tapered polygon.
- The Friction Bite: When an octagonal peg is driven into a round hole, the sharp corners of the polygonal facets bite aggressively into the round walls of the auger hole. This created intense friction that prevented the peg from backing out over centuries.
- Inspecting Under Magnification: Using a 10x loupe, examine the perimeter of the peg head. You should clearly see tiny, flat hand-chisel facets, subtle knife gouges, and irregular gaps where the polygon met the round hole. If the peg is perfectly cylindrical and smooth, it was cut from modern extruded dowel stock.
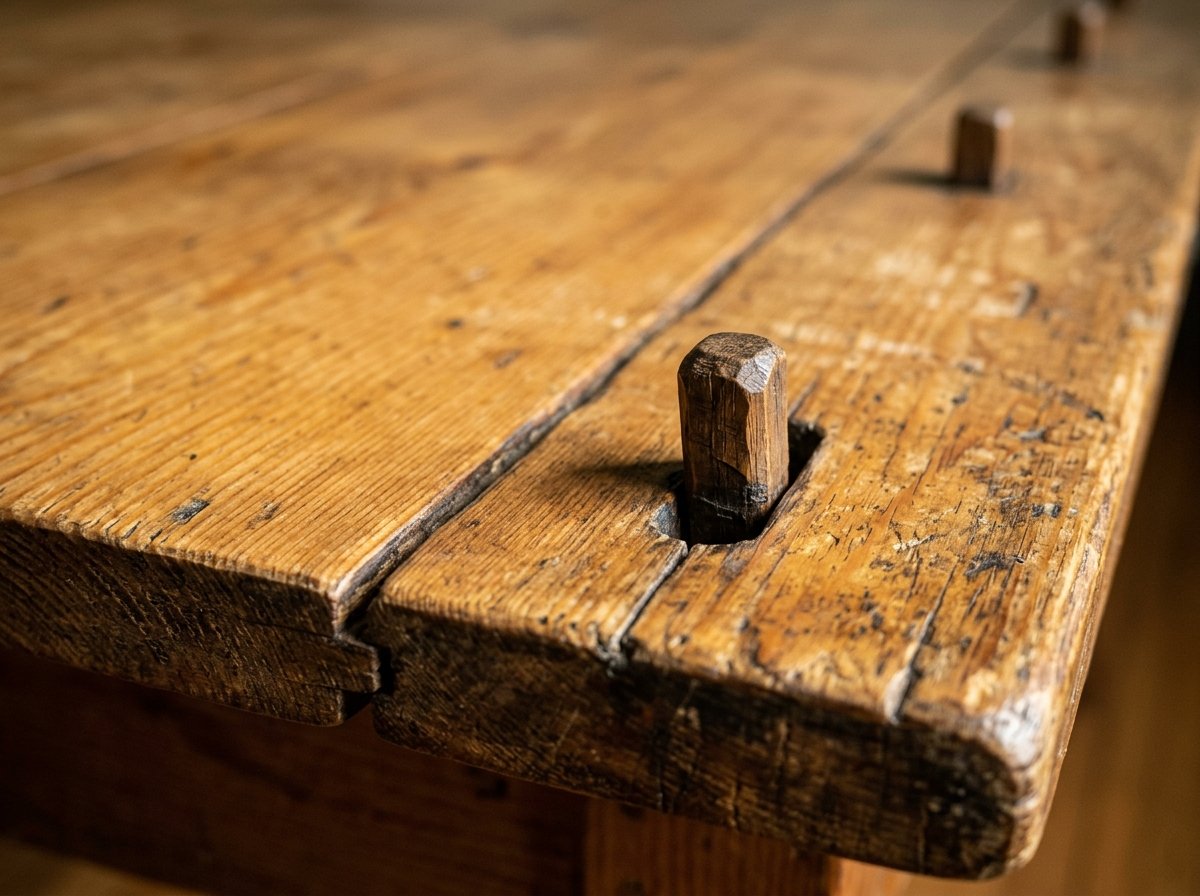
4. Breadboard End Peg Mechanics: Seasonal Expansion Slots
Nowhere is peg forensics more revealing than on the breadboard ends of antique harvest tables, refectory tables, and antique hutch tables (chair tables).
A tabletop composed of wide solid boards will expand and contract across its width by up to 1/2 to 3/4 of an inch between humid summers and dry winters. If the transverse breadboard end cap were glued or rigidly pegged across the entire width, the massive hydraulic pressure of expanding wood would tear the tabletop apart or buckle the joints.
The 18th-Century Slotted Peg Secret:
- The Center Anchor: The center peg was driven through a standard round hole in the central tenon, locking the middle of the breadboard cap in place.
- The Elongated Outer Slots: The outer pegs were driven through horizontally elongated oval slots cut into the outer tenons. The pegs held the breadboard cap tight against the end of the boards, but the elongated slots allowed the outer tenons to slide back and forth freely as the table breathed seasonally.
- The “Shrinkage Ear” Diagnostic: In dry winter conditions, the tabletop boards shrink narrower than the fixed breadboard end cap, creating protruding “ears” (the end cap overhangs the sides by 1/8 to 1/4 inch). In humid summer, the tabletop expands flush or slightly beyond the end cap. If a breadboard end is glued solid or reveals no movement tolerance, it is a modern amateur reproduction that will inevitably split.
5. Spotting the Imposters: How to Detect Fake Applied Wooden Pegs
Because antique buyers know that “pegs mean old,” reproduction manufacturers and unscrupulous dealers routinely fake wooden peg joinery on 20th-century furniture. Here are the three primary scam techniques and how to unmask them:
Scam A: The Blind Dowel Plug (The “Cap” Trick)
The builder constructs a table using modern pocket screws, metal brackets, or machine dowels. To simulate a 1700s drawbore joint, the builder drills a shallow 1/4-inch blind hole into the exterior face of the leg and glues in a 1/4-inch slice of wooden dowel, sanding it roughly flush.
The Inspection Test: Reach under the table or use an inspection mirror. On an authentic structural mortise-and-tenon joint, the drawbore peg passes completely through the joint. On the inside face of the apron, you will clearly see the clipped end or exit hole of the peg in raw, unsealed wood. A fake peg exists solely on the cosmetic outside face—there is zero evidence of a peg penetrating the tenon inside.
Scam B: Modern Fluted Dowels
Factory dowel machines produce dowels with spiral or straight longitudinal compression grooves to allow excess glue to escape. If you encounter a loose or damaged peg on a “primitive antique” table, inspect its side profile: spiral fluting is definitive proof of post-1900 factory manufacture.
Scam C: Burned or Stamped Artificial Pegs
In low-end 1960s–1970s Colonial Revival dining sets, manufacturers used hot branding irons or dark dye stamps to burn circular “peg marks” directly onto flat lumber surfaces to mimic country joinery from ten feet away. Running a fingernail over the surface reveals completely uninterrupted flat wood grain with no joint separation whatsoever.
6. Historical Timeline: Dating Wooden Pegs Across 300 Years (1650–1950)
Combine your peg forensics with our companion guides on dating furniture by screws, dating by nails, and dating by dovetails to establish precise historical periods:
| Historical Period | Date Range | Typical Peg Characteristics | Joinery Context & Secondary Fasteners |
|---|---|---|---|
| Pilgrim & Jacobean | 1650–1700 | Large, robust 3/8″ to 1/2″ octagonal oak pegs; multiple pegs per joint; prominent proud protrusion. | Massive mortise-and-tenon framing; wrought iron rosehead nails; heavy white oak and pine. |
| William & Mary / Queen Anne | 1700–1760 | Refined 1/4″ to 5/16″ hand-whittled pins; often driven from rear or interior faces to preserve formal front aesthetics. | Drawbored aprons, cabriole leg joints, early rule joints on drop leaves; hand-filed blunt screws. |
| Chippendale & Country Georgian | 1755–1785 | Tapered dense pins on country tavern/harvest tables; breadboard end drawbores; concealed on high-style mahogany. | Hand-cut dovetails; blunt screws; cast brass hardware; extensive use of white oak pins in pine aprons. |
| Federal & Classical Revival | 1790–1830 | Minimal exterior pegs on high-style pieces (demilune tables and pembroke tables use internal glue blocks and screws). | Wooden pegs restricted to country tables, drop-leaf swing gates, and heavy workbenches. |
| Victorian Machine Factory Era | 1850–1900 | Hand-whittled pegs obsolete; replaced by machine-cut factory dowels and patented joints like the Knapp joint. | Pointed gimlet screws, wire nails, hidden factory doweling with synthetic animal glues. |
| Colonial Revival Era | 1920–1960 | Decorative, non-structural dowel caps glued into blind holes to simulate hand-crafted antique joinery. | Modern machine screws, plywood core tops, uniform rotary veneers, sprayed nitrocellulose lacquer. |
Frequently Asked Questions About Antique Wooden Pegs
How do you date antique furniture by wooden pegs?
To date antique furniture by wooden pegs, inspect their elevation, shape, and tool marks. Genuine pre-1830 pegs stand slightly ‘proud’ (elevated 1/32 to 1/16 inch) due to cross-grain shrinkage of the surrounding wood, display hand-whittled polygonal facets (not smooth cylindrical machine dowels), and occupy holes that have shrunk into subtle ovals.
Why do wooden pegs stick out on antique furniture?
Wooden pegs stick out (stand ‘proud’) on antique furniture because wood shrinks across its tangential grain over centuries of humidity changes, but experiences virtually zero dimensional shrinkage along its longitudinal length. Because pegs are driven with their end-grain facing outward, the surrounding table leg or apron shrinks down, leaving the peg protruding.
What is a drawbore pin in antique furniture?
A drawbore pin is a tapered wooden peg driven through intentionally offset holes drilled through a mortise-and-tenon joint. The hole in the tenon is offset 1/16 to 1/8 inch closer to the shoulder. Driving the peg acts as a mechanical wedge, pulling the joint together under enormous tension without requiring glue or metal clamps.
How can you tell if wooden pegs on a table are fake?
Fake wooden pegs on reproduction furniture are shallow, decorative dowel plugs glued into blind 1/4-inch drilled holes on the exterior face. In an authentic antique, the drawbore peg penetrates entirely through the mortise and tenon, with the protruding or clipped exit end clearly visible on the raw, unsealed interior of the table apron.
Final Field Checklist: 5-Point Physical Wooden Peg Inspection
Before purchasing or insuring an antique table represented as 17th-, 18th-, or early 19th-century, execute this 5-point physical joinery inspection:
- Perform the Finger Drag Test: Run your fingertips across the peg. Authentic antique pegs must feel noticeably raised (standing “proud” 1/32″ to 1/16″) due to cross-grain wood shrinkage. If it feels dead flat, suspect a modern sander or reproduction dowel.
- Audit the Peg with a 10x Loupe: Inspect the perimeter. Look for hand-whittled knife facets (hexagonal or octagonal shape) and an ovalized hole. Reject pieces with perfectly round, glass-smooth machine dowels.
- Check for Through-Penetration on the Interior: Look inside the table apron. An authentic drawbore pin passes completely through the joint, showing a clipped or exposed end on the unsealed interior framing.
- Test the Breadboard End Slots: On farm table tops, confirm that outer breadboard pegs pass through slotted tenons that allow the top planks to breathe seasonally without splitting.
- Verify Cross-Timber Species: Check whether the peg is carved from dense white oak or hickory contrasting with a pine or poplar apron—a hallmark of authentic 18th-century structural engineering.
By mastering these forensic joinery benchmarks, you can separate genuine pre-industrial masterworks from 20th-century reproductions—confidently authenticating the craftsmanship and value of historical furniture.
Pingback: How to Date Antique Furniture by Screws: The Complete Forensic Guide
Pingback: Antique Tavern Table Identification & Value: The Collector’s Guide
Pingback: Antique Trestle Table Identification & Value (2026 Guide)
Pingback: Antique Farmhouse Dining Table Identification & Value (2026 Guide)